How to use MERCUSYS Solar Panel with MERCUSYS Battery Security Cameras
Step 1: Position the Solar Panel
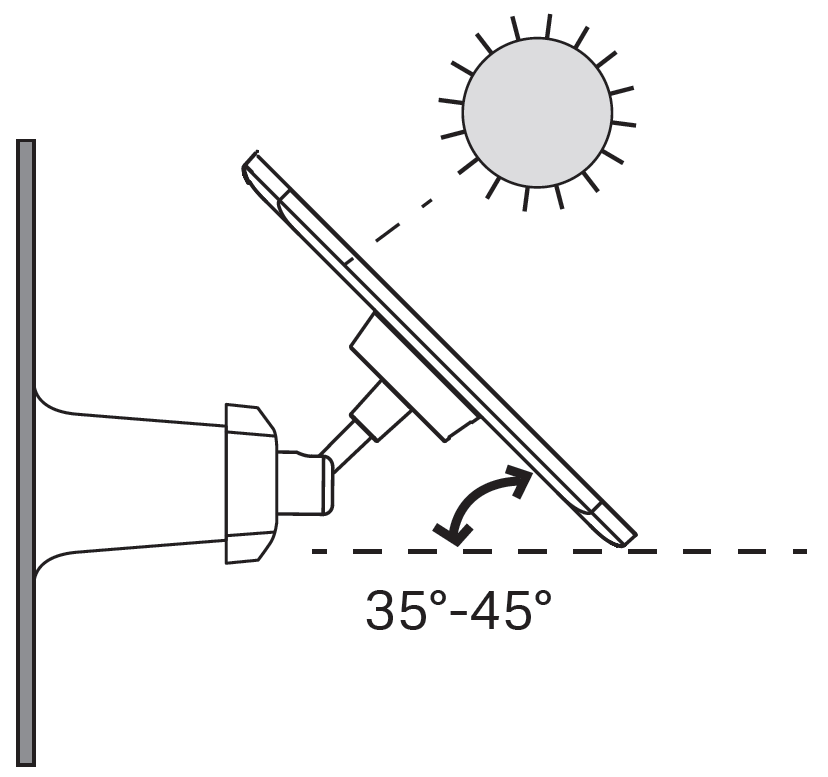
Note: The position and tilt angle of the solar panel greatly affect the solar efficiency.
1. Choose a location where the solar panel gets the most sunlight throughout the year.
2. Position the panel south-facing in the Northern Hemisphere or north-facing in the Southern Hemisphere. The recommended tilt angle between the panel and the horizontal ground is 35° - 45°.
3. Regularly wipe the panel to remove dust and debris.
Step 2: Mount the Solar Panel
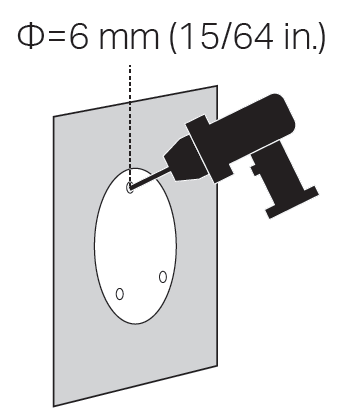
1. Drill Holes
Stick the solar panel mounting template sticker to the solid and level mounting place. Drill three holes according to the template.
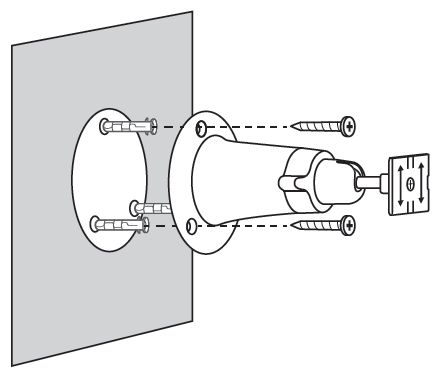
2. Mount Bracket
Insert three mounting anchors into the holes and use the mounting screws to affix the solar panel bracket over the anchors.
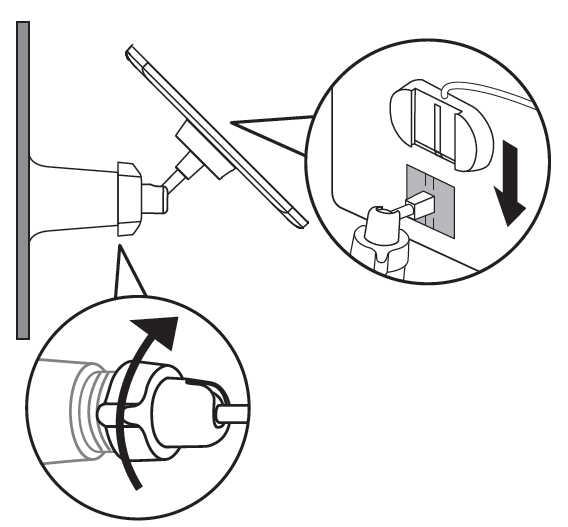
3. Install the Solar Panel
Slide the solar panel onto the mounting bracket until it clicks into place. Then rotate the adjustable screw but keep it loose, tilt the solar panel to adjust the angle, and tighten the adjustable screw.
Note: The recommended tilt angle between the panel and the horizontal ground is 35° - 45°.
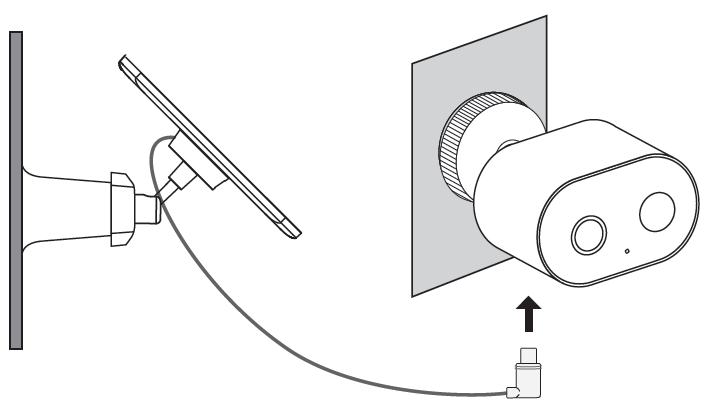
Step 3: Connect Solar Panel to the Camera
Connect the solar panel by inserting the connector into the camera charging port until snug.
Note: In harsh weather conditions or challenging environments (e.g., intense sunlight, high salt-alkaline areas), please wrap additional tape around the connection points of the extension cord to enhance waterproofing and protection.
Get to know more details of each function and configuration please go to Support Center to download the manual of your product.