How to set up IPSec VPN on MERCUSYS 5G Wi-Fi router
IPSec VPN is used to create a VPN connection between local and remote networks.
The typical VPN topology is as below. Site A refers to the local network, and Site B refers to the remote network to be connected.
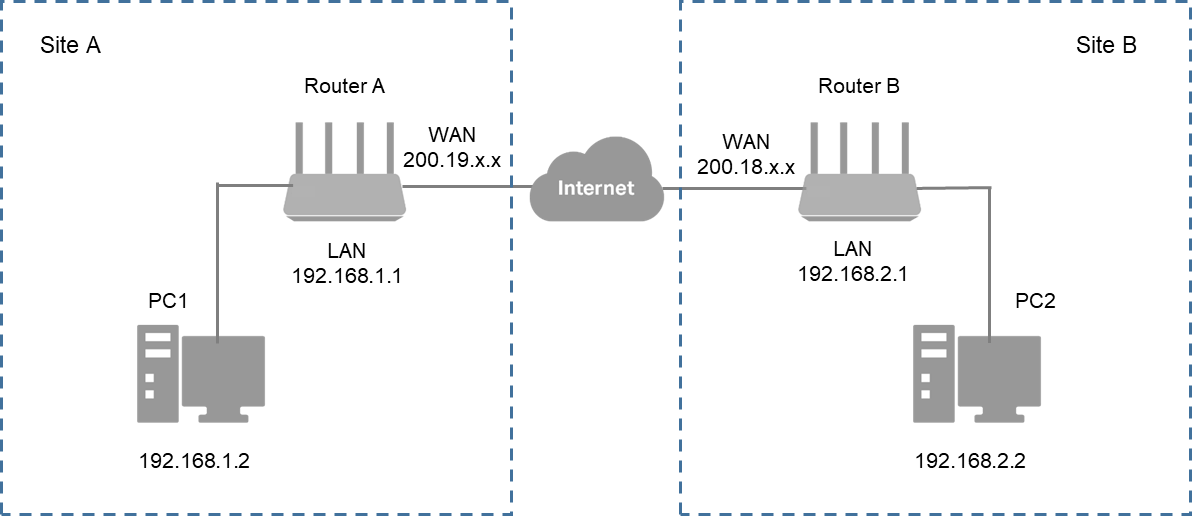
To use IPSec VPN, you need to check that both local and remote routers support IPSec VPN feature. Before starting the configuration, please record the LAN and WAN IP addresses of both sites. Then, you may follow the steps below to set up an IPSec VPN connection.
Note: To maintain a stable VPN connection, we recommend enabling DDNS (Dynamic Domain Name System) on the router. It binds your WAN IP to a domain name, preventing connection issues caused by changing WAN IP addresses. You may refer to How to configure DDNS with MERCUSYS 5G/4G Wi-Fi Router to configure DDNS.
Step 1. Configure on Site A (local network)
1. Log in to the router’s web management page. You can refer to How to log in to the management interface of MERCUSYS 5G/4G Wi-Fi Router & Mobile Wi-Fi.
2. Go to Advanced > VPN > IPSec VPN, and click Add.
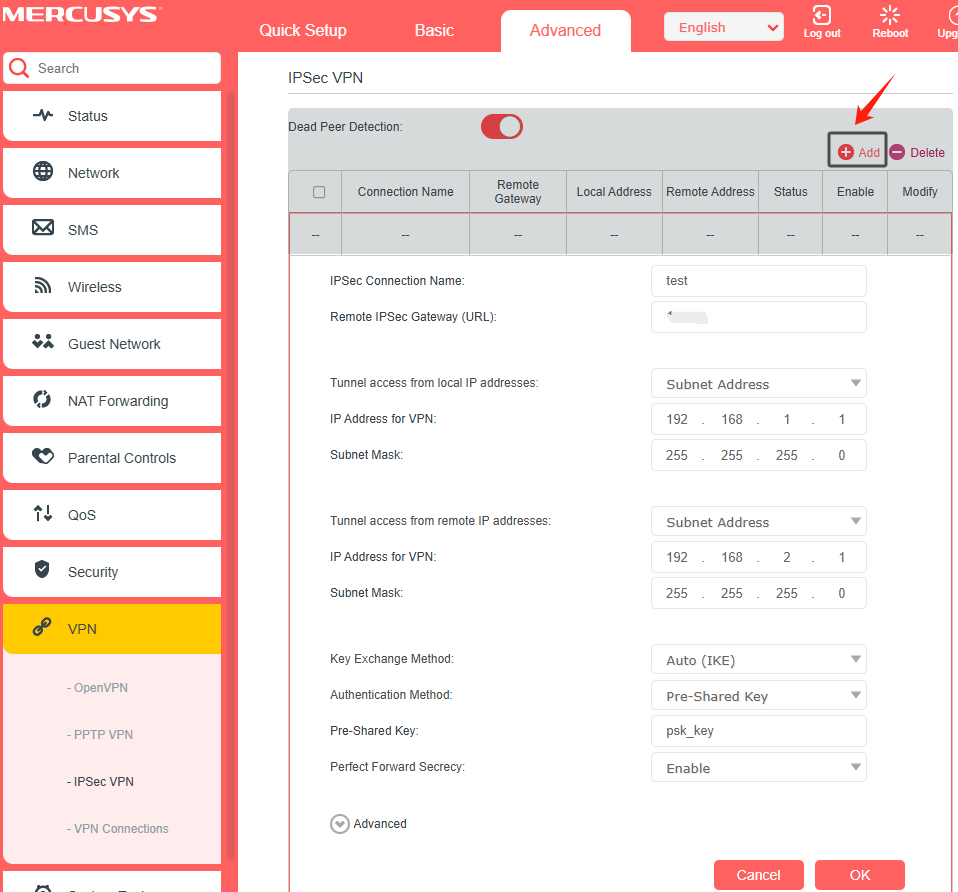
3. Configure the necessary information as below, then click OK to save the settings.
IPSec Connection Name: Enter a name for the connection.
Remote IPSec Gateway (URL): Enter the WAN IP address of Site B.
Local Network (Site A):
Under Tunnel access from local IP addresses column, select Subnet Address as an example.
IP Address for VPN: Enter the LAN IP of Site A.
Subnet Mask: Enter the subnet mask of Site A.
Remote Network (Site B):
Under Tunnel access from local IP addresses column, select Subnet Address as an example.
IP Address for VPN: Enter the LAN IP of Site B.
Subnet Mask: Enter the subnet mask of Site B.
Key Exchange Method: Here we select Auto (IKE).
Pre-Shared Key: Enter the pre-shared key for IKE authentication, and keep Perfect Forward Secrecy enabled.
Note: Both Site A and Site B must use the same key.
Advanced Settings: We recommend keeping the default values.
Step 2. Configure on Site B (remote network)
Refer to Step 1 configuration on Site A and apply the corresponding settings to Site B. Ensure that Site A and Site B use the same Pre-Shared Keys and Perfect Forward Secrecy settings.
Step 3. Check the IPSec VPN connection
Connect a computer to Site A, and ping Site B’s LAN IP from the computer to confirm that the IPSec VPN connection is set up correctly.
You may refer to How to Use the Ping Command for details.
If the ping test is successful (you receive replies from the host in Site B), the IPSec connection is working properly.
Get to know more details of each function and configuration please go to Support Center to download the manual of your product.