How to setup the VoIP function on MERCUSYS XPON Router
Note: Only after you have Internet access on the XPON router, you can set up your VOIP function successfully.
Here we take MF30Gv for demonstration.
Step 1
Log in to the web interface of the XPON Router.
For details, please refer to How to log into the web-based interface of the MERCUSYS XPON Router.
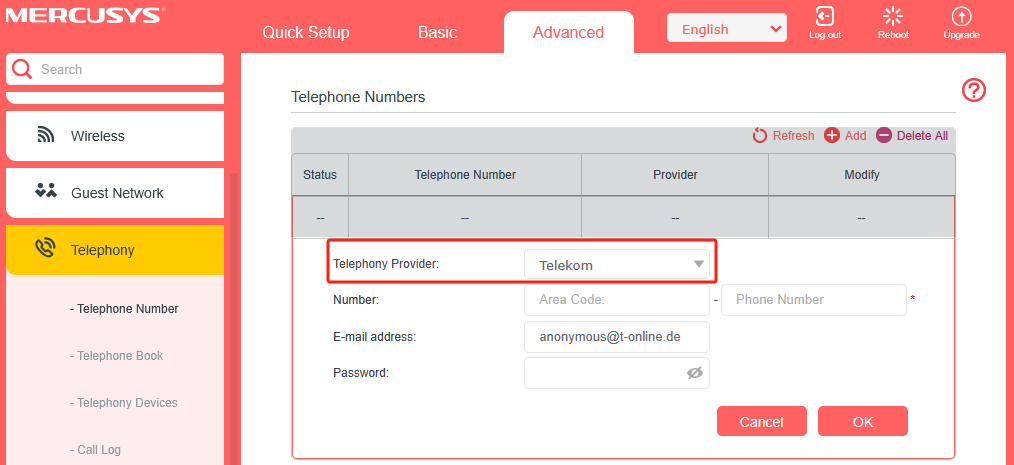
Then go to Advanced > Telephony > Telephone Number, and click Add.
Step 2
Choose your Telephony Provider and enter the necessary information as required, and click Save to make the settings effective. Different telephony providers have different parameters. Contact your provider if you don’t know what to put in.
Step 3
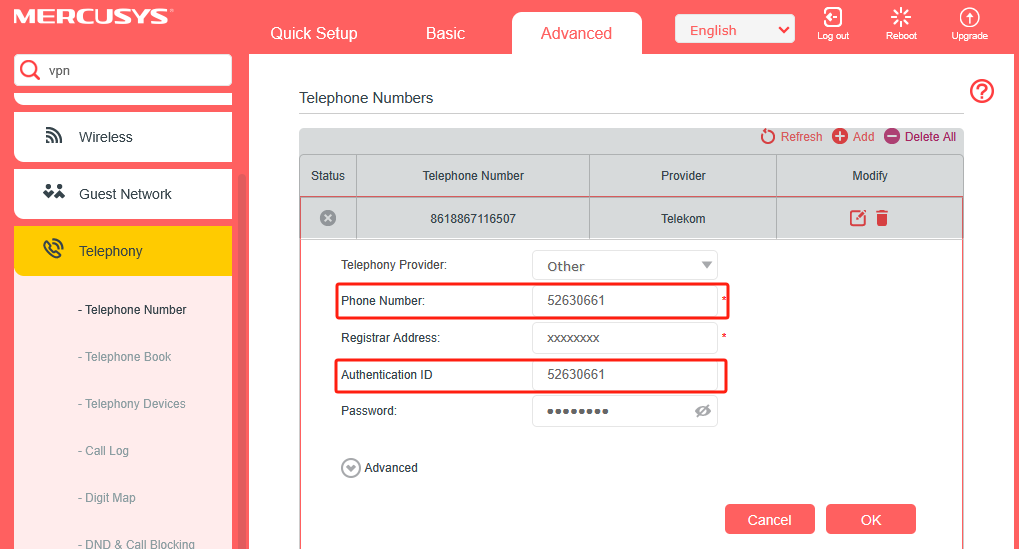
If your Telephony Provider is not listed, please choose Other as a telephony provider and fill in the parameters required. Click Save to make the settings effective.
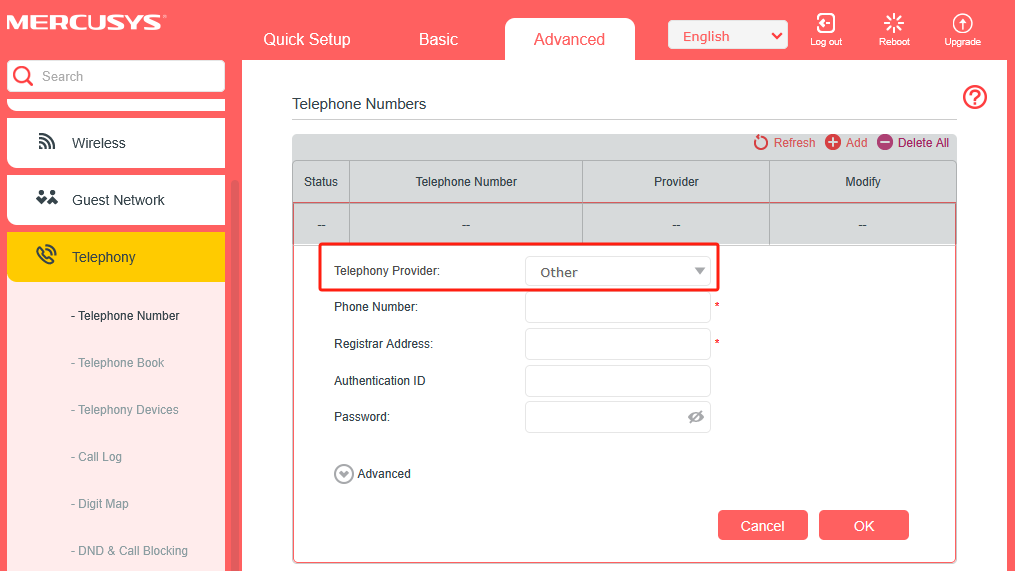
Phone Number: The number you use to dial and answer.
Registrar Address: Usually a domain name or IP address of the VoIP register server.
Authentication ID and Password: Not necessary information, but if you have them, fill them in accordingly.
If the VoIP provider also provides a SIP Proxy address and an Outbound Proxy address, you can click the Advanced option and fill in the content of the Advanced option. If the VoIP provider does not provide this information, please click Save directly.
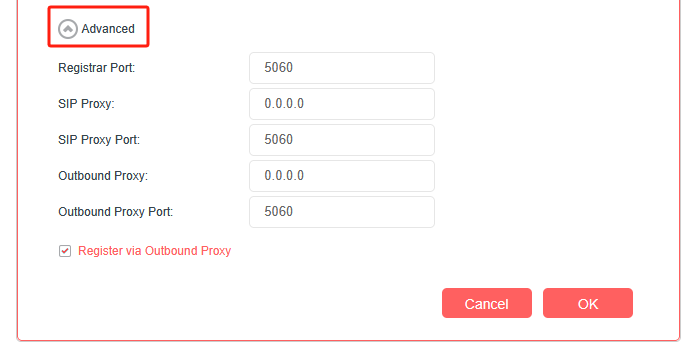
Registrar Port: Typically 5060, unless your VoIP provider specifies a different port.
SIP Proxy: The domain name or IP address of the SIP Proxy Server.
SIP Proxy Port: Typically 5060, unless your VoIP provider specifies a different port.
Outbound Proxy: The domain name or IP address of the Outbound Proxy Server.
Outbound Proxy Port: Typically 5060, unless your VoIP provider specifies a different port.
Register via Outbound Proxy: Typically not required to enable.
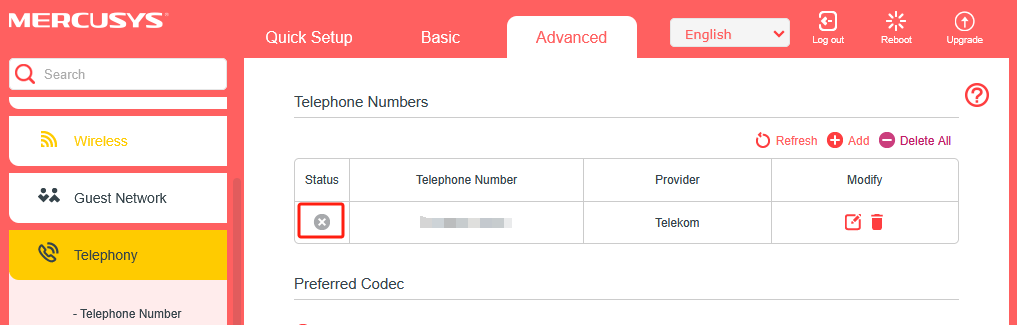
Then please click Save to see if the VoIP registration is successful. If it is successful, the status of the registration entry will be a checkmark (√). If the registration fails, it will be a cross (×).
What to do if the registration fails
1. Check if the information provided by your VoIP provider is filled in the correct fields and is entered accurately. Confirm with the VoIP provider whether the information is correct.
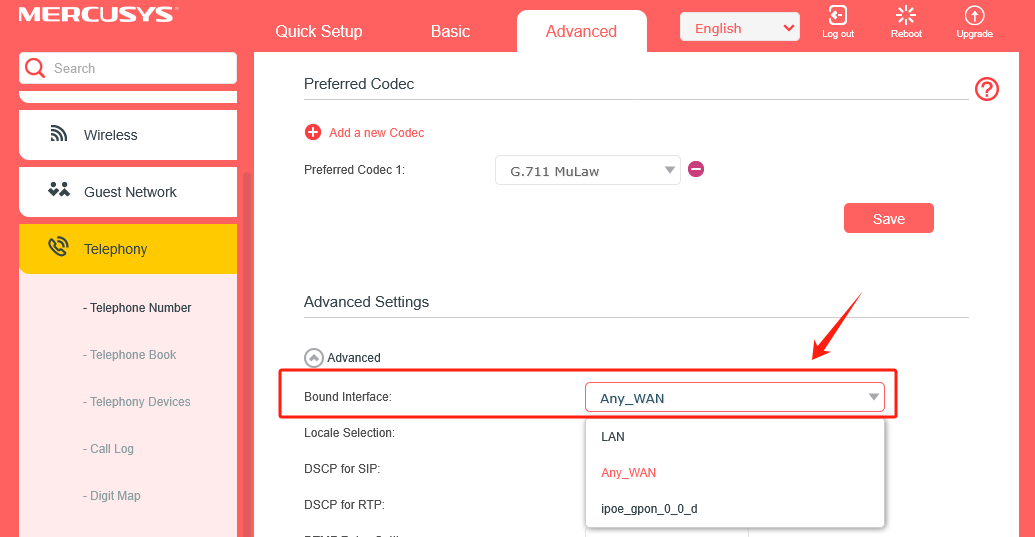
2. In the "Advanced Settings" section of the VoIP registration page, find the "Bound interface" option. Select either "Any WAN" or the Internet connection interface you are using for Internet access (e.g., ipoe_gpon_xxx).
3. Some VoIP providers may authenticate using the phone number, so please fill in the phone number field the same as the authentication ID. Then try registering again.
4. If you have other old routers that support VoIP, please test whether the VoIP can register successfully with the old routers.
Get to know more details of each function and configuration please go to Support Center to download the manual of your product.