How to Configure the MERCUSYS Travel Router in Access Point Mode
The MERCUSYS Travel Routers support multiple operating modes to accommodate diverse connectivity needs, including Wireless Router/Access Point/Range Extender/Client/Hotspot mode. This article provides step-by-step instructions for configuring them in access point mode effectively.
Access Point (AP) mode primarily converts a wired connection into a wireless one. It functions similarly to a switch and is typically placed behind a router. If you're in an office, hotel, or any location where only a wired network is accessible but you require a temporary wireless network, AP mode is the ideal choice. If it doesn’t match your network environment, please identify which operation mode is suitable for you first.
Note: This guide uses MR84X-Travel as a reference model to show the installation steps. The actual interface and function options shown in this FAQ may vary slightly from those of your product model. For more details, please refer to your router's User Guide.
Step 1. Connect the travel router’s WAN/LAN port to the existing router’s LAN port or wall Ethernet jack using the Ethernet cable.
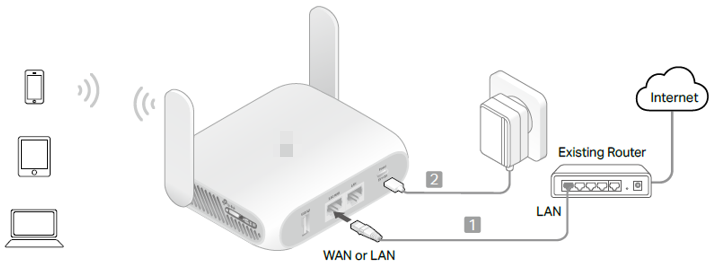
Step 2. Connect one computer to the travel router wirelessly or via a wired connection.
- Wirelessly: Connect your computer to the router’s Wi-Fi. The default wireless network name (SSID) and wireless password are printed on both the Wi-Fi info card and the label at the bottom of the router.
- Wired: Turn off the Wi-Fi on your computer and connect to the LAN port of the router with an Ethernet cable.
Step 3. Open a browser and go to mwlogin.net or 192.168.1.1, then create a local password to sign in to the web management page. If you have already configured this device, it will ask you to enter the local password. Once signed in, go to Step 6.
Note: If you do not remember the local password, get a pin to press the reset hole for 6 seconds to perform a hard reset.
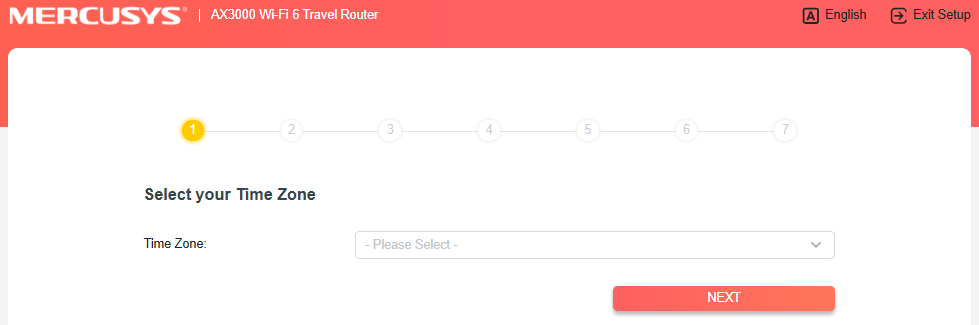
Step 4. Select your time zone, and click NEXT.
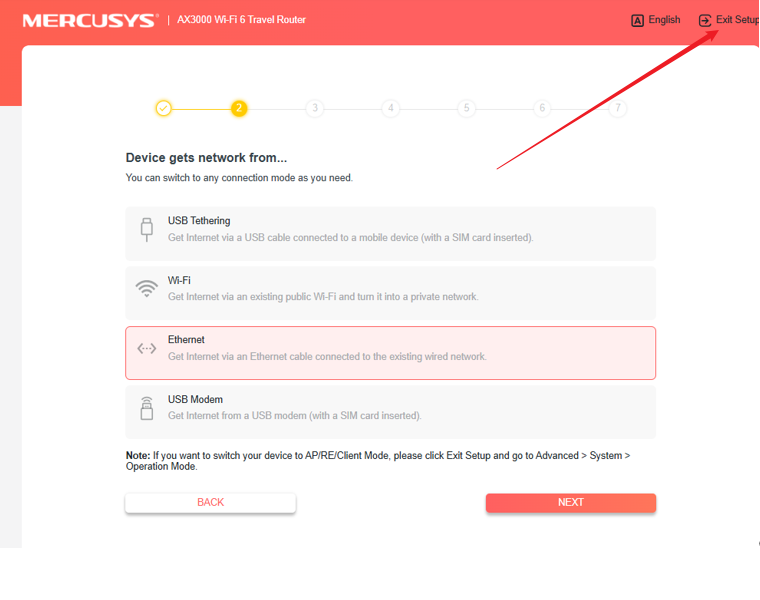
Step 5. On the next page, select Exit Setup, then click EXIT in the pop-up dialog to terminate the current configuration.
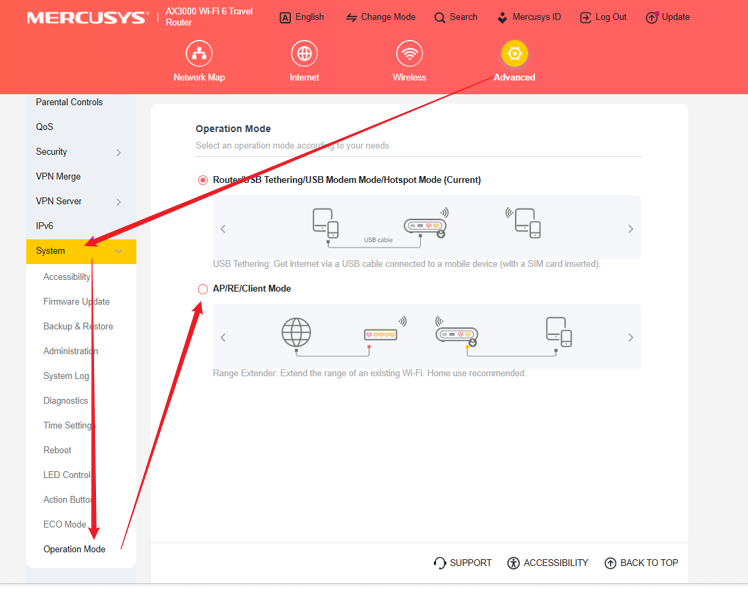
Step 6. Navigate to Advanced > System > Operation Mode, select AP/RE/Client Mode, and apply changes with SAVE.
Note: When switching from Range Extender Mode or Client Mode to Access Point, navigate to Advanced > Network > Network Mode, select Access Point as the active configuration, then confirm the changes by clicking SAVE. (Configuration requires a system reboot to activate new parameters.) Then go to Step 8.
Step 7. In the next confirmation window, revalidate the Access Point mode selection, then execute REBOOT and await successful configuration deployment.
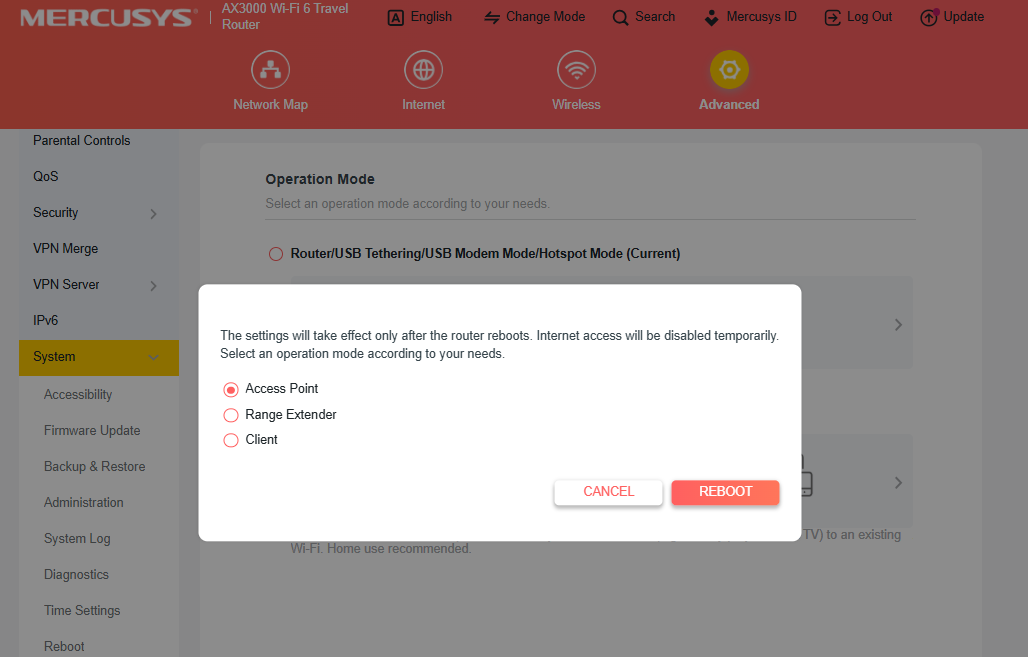
Step 8. Access the web management page via mwlogin.net and authenticate using the local password.
Step 9. Set your time zone, configure the Access Point as the network mode, then click NEXT.
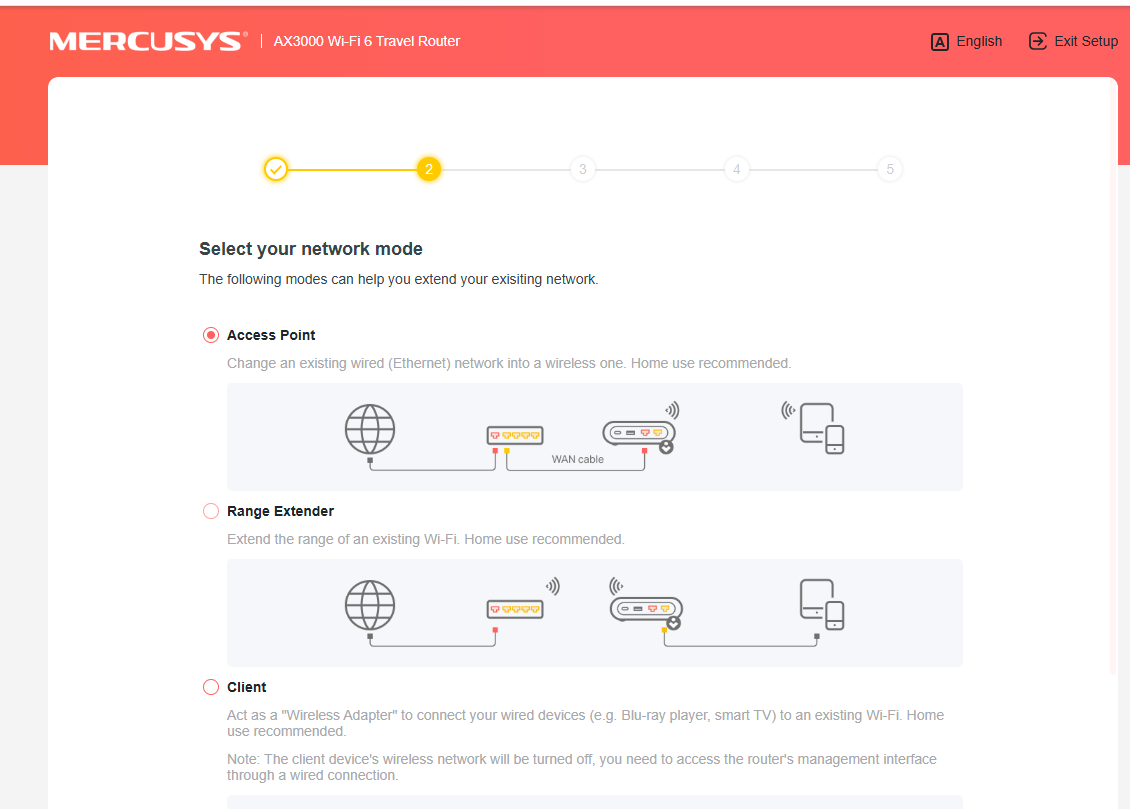
Step 10. Either customize your wireless network name and wireless password for the 2.4GHz/5GHz wireless network or keep the default ones by clicking USE THE CURRENT Wi-Fi SETTINGS, and then click NEXT.
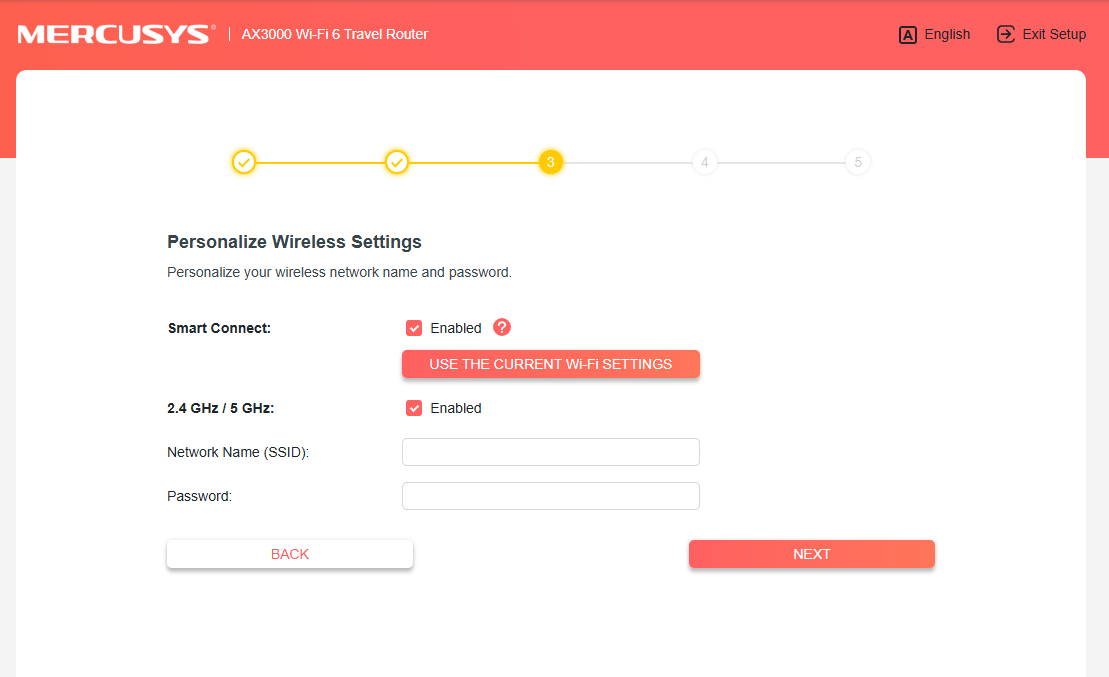
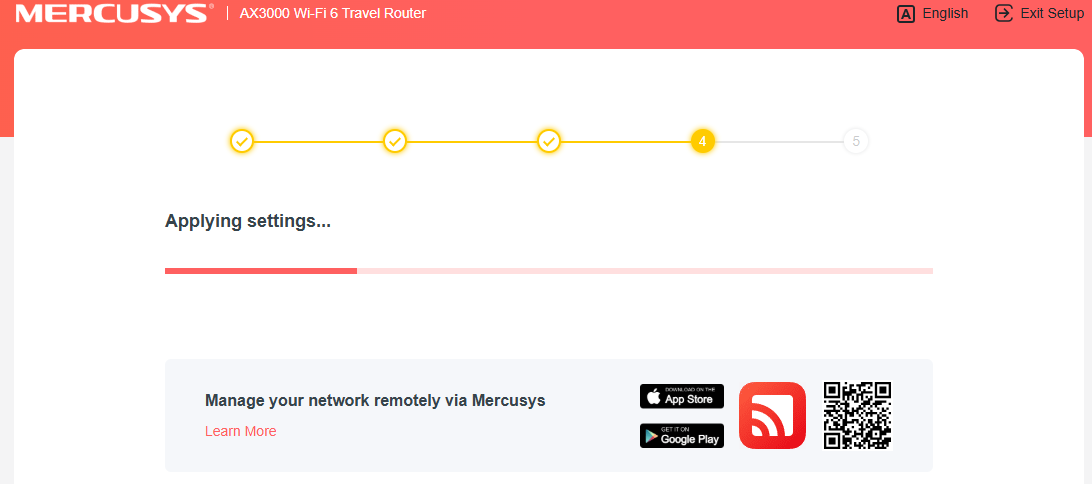
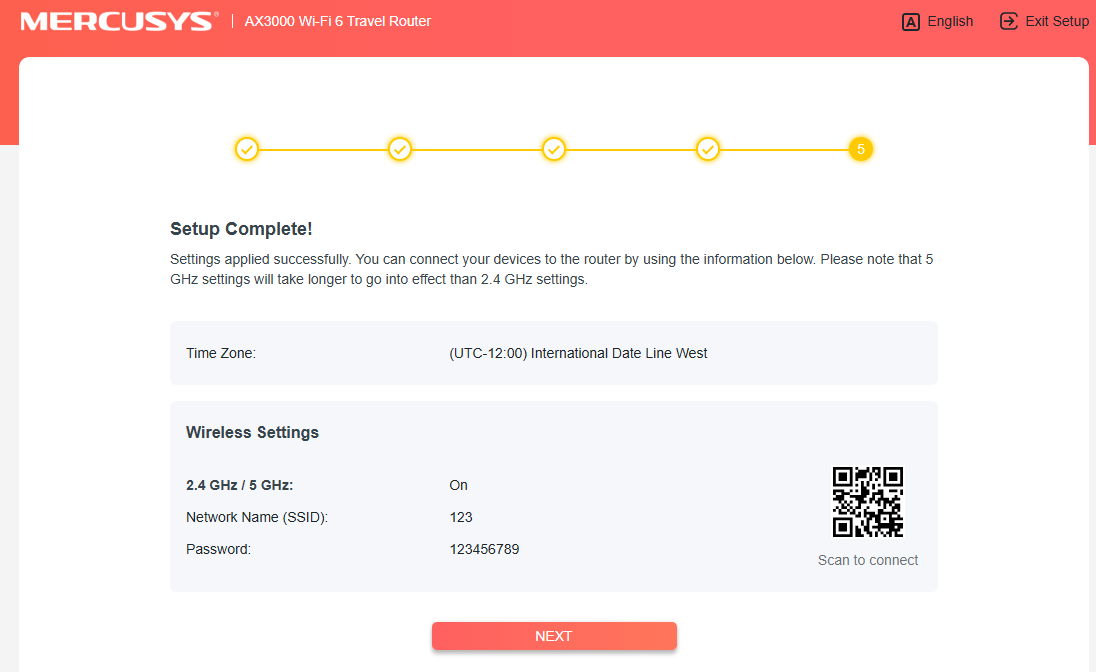
Step 11. Then complete the setup by following the on-screen instructions.
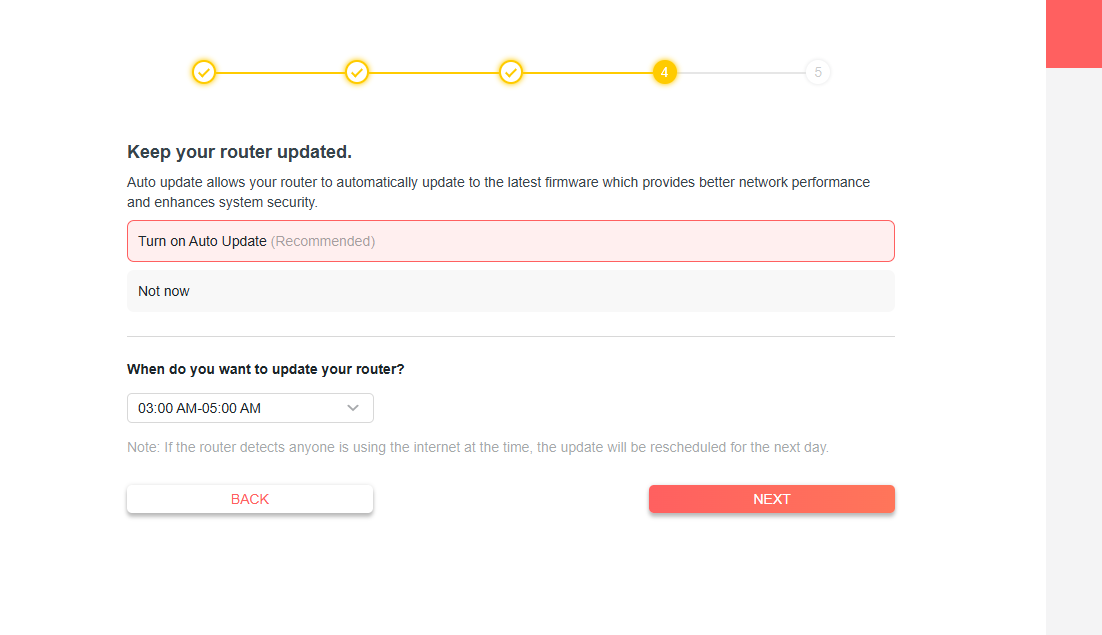
Get to know more details of each function and configuration please go to Support Center to download the manual of your product.