How to set up an IPv6 Internet connection on the MERCUSYS Wi-Fi Router
Before Getting Started:
Your ISP should have provided the following info and additional credentials for logins:
PPPoE, Dynamic IP (SLAAC/DHCPv6), Pass-Through (Bridge), and Static IP.
Note: You may have received this information when your first signed up with your ISP. Otherwise, please get in contact with the support team from your ISP as they can provide the information.
Set Up IPv6 on the MERCUSYS Router
Here we take MR80X as an example.
Note: The specific features may vary across different models. Please refer to your actual router model for details.
1. Visit http://mwlogin.net and log in with the password you set for the MERCUSYS router.
2. Go to Advanced > IPv6, enable IPv6 option.
3. Select the IPv6 connection type provided by your ISP.
Note: Contact your ISP if you do not know your IPv6 internet connection type and configuration information.
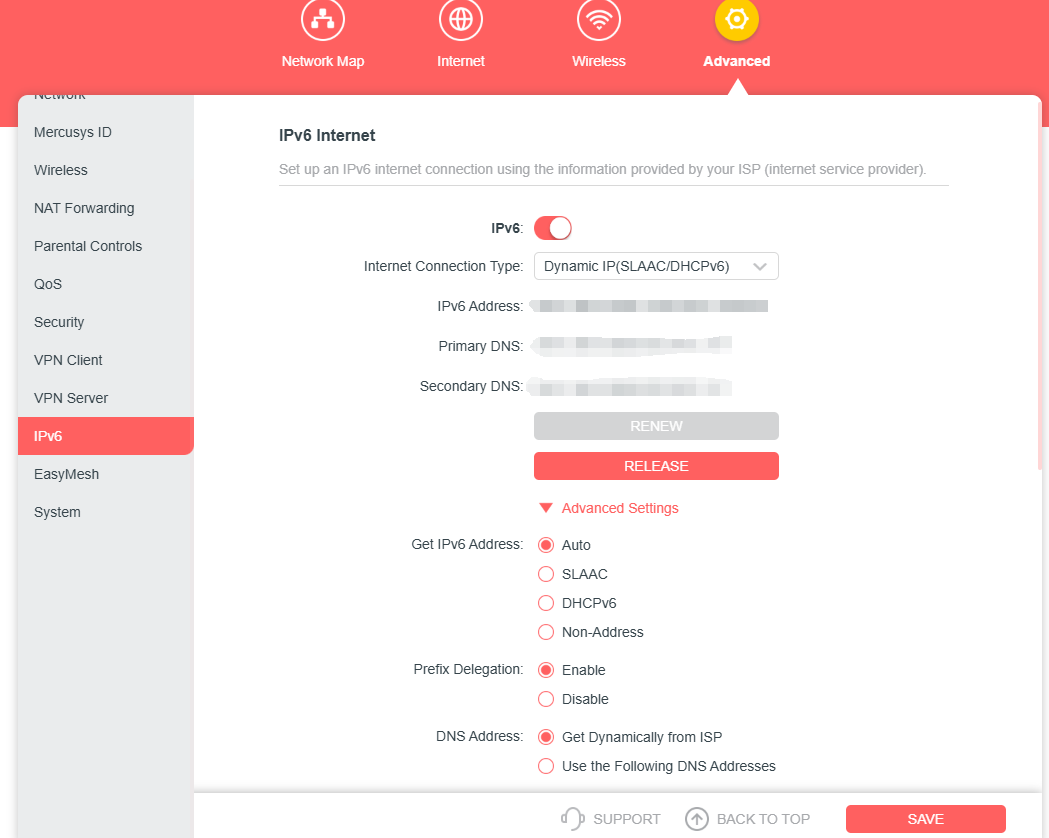
Case 1: Dynamic IP
1. Select Dynamic IP(SLAAC/DHCPv6).
2. Go to Advanced settings, Select Auto in “Get IPv6 Address”. Select Enable in “Prefix Delegation”.
3. Click Save.
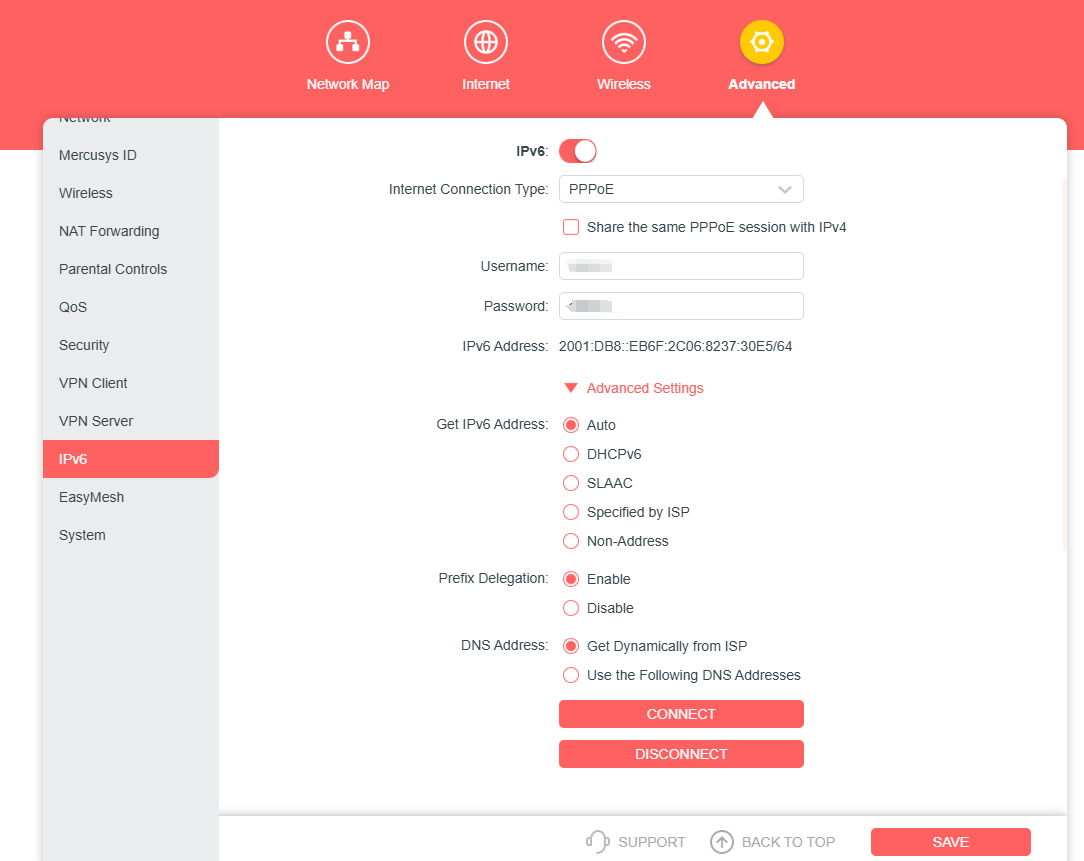
Case 2: PPPoE
1. Select PPPoE. Enable Share the same PPPoE session with IPV4.
If Your ISP Provided 2 Separate Accounts for the IPv4 and IPv6 Connections:
Uncheck the Box for “Share the Same PPPoE Session with IPv4, manually Enter the Username and Password You Were Given By Your ISP for the IPv6 Connection
2. Go to the Advanced Settings Tab, Select Auto under the option for “Get IPv6 Address”.
3. Select Enable in “Prefix Delegation”.
4. Click Save.
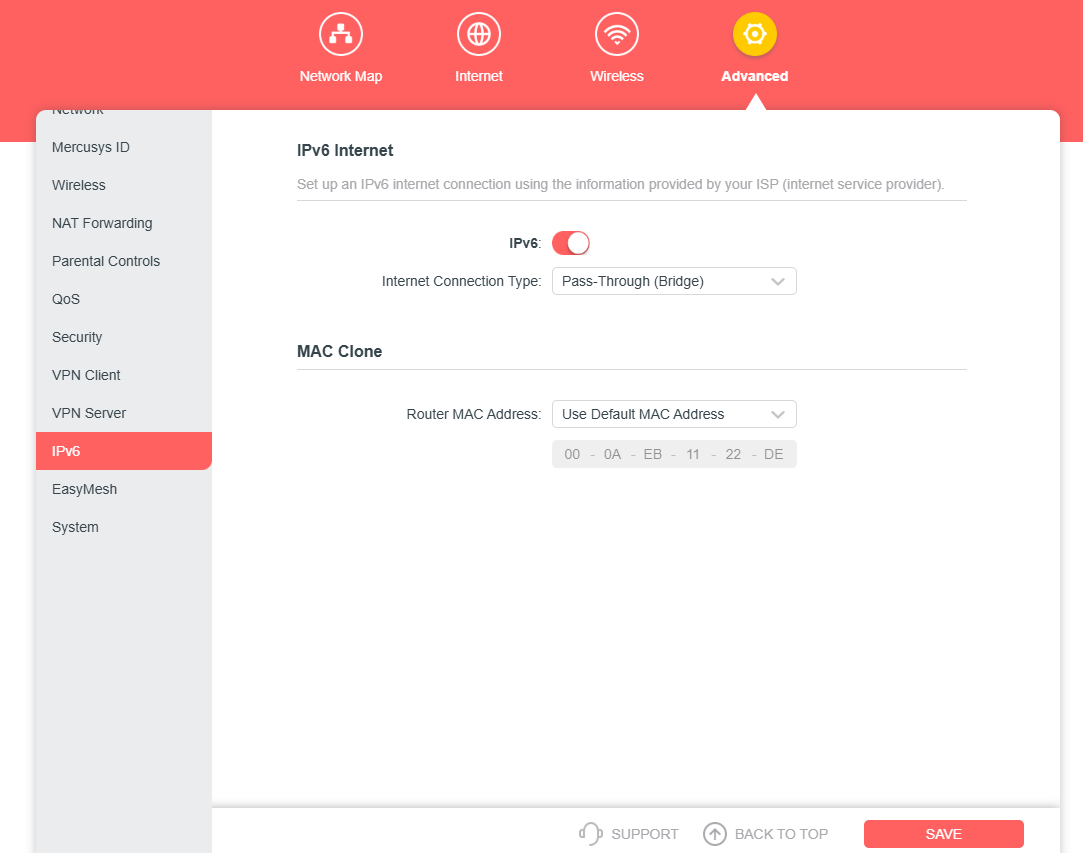
Case 3: Pass-Through (Bridge)
If there ss a Main Router in front of your MERCUSYS Wi-Fi Router, you can set the MERCUSYS Router's IPv6 connection type to Pass-Through
1. Select Pass-Through (Bridge) for the Internet Connection Type.
2. Click Save.
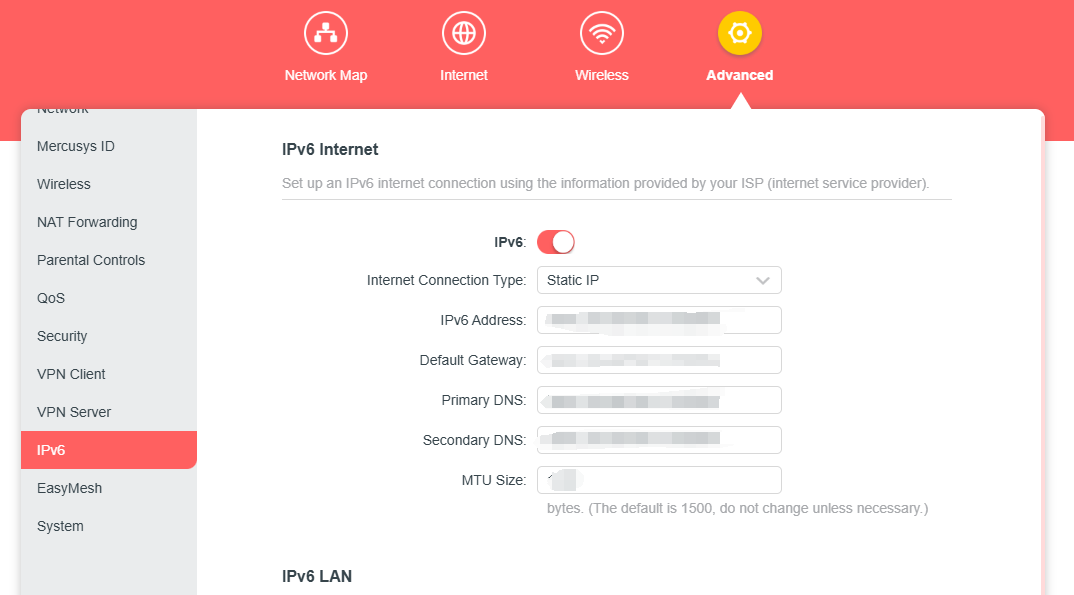
Case 4: Static IP
1. Select Static IP.
2. Manually Enter the Information Provided by Your ISP.
3. Click Save.
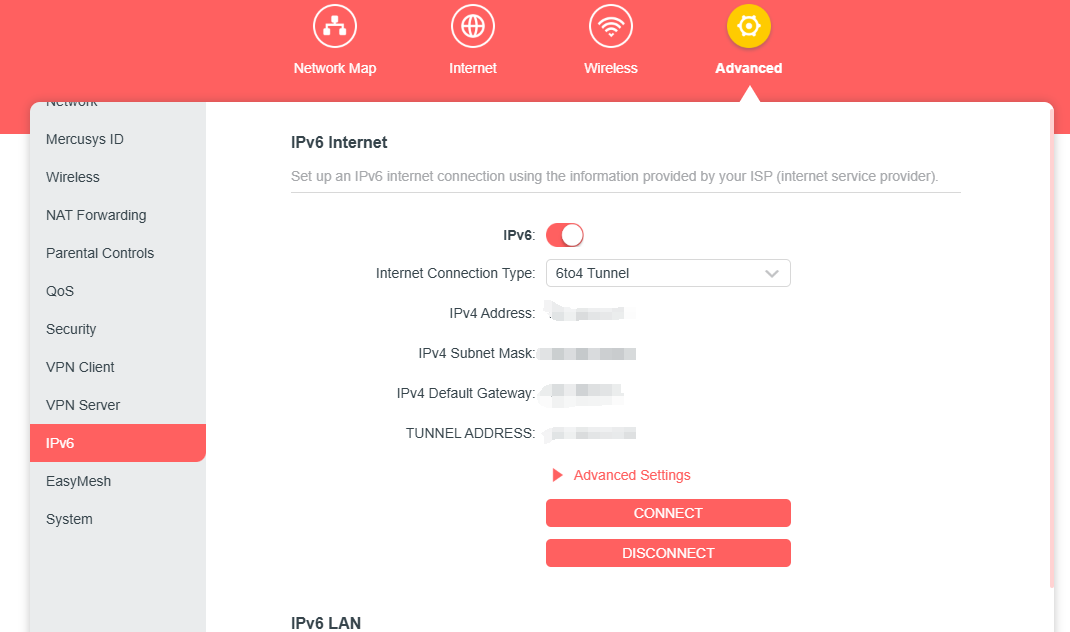
Case 5: 6 to 4 Tunnel:
1. Select 6 to 4 Tunnel: An IPv4 internet connection type is a prerequisite for this connection type.
3. Click Save.